At our house, we have been using homemade napkins made out of quilting cotton for a couple of years now and after a zillion washings, they are super soft. They sometimes get used in the kitchen just because they are around which inspired the idea of using quilting cotton for kitchen towels. Quilting cotton is a little too thin for a towel, which needs to be a little beefier, so here’s my super easy, super fun totally stash busting tutorial for making your own kitchen towels.
Maude Asbury's fun Kitchy Kitchen fabric was used to make these kitchen towels.
These towels are super soft and perfect for your fine crystal. What’s that you say? You are not using fine crystal for your
everyday juice needs? No worries – these will work for sticky little fingers or
plastic juice cups just as well. In
fact, the more you wash them, the softer they get. Pretty soon you’ll be whipping up large sized
ones for pool-side. Ok maybe not. But, these look super cute and fun in your kitchen and you can bust through some of your fabric stash this way!
Ready? Here we go...
You will need
1/2 yd of your favorite fabric
-or- 2 fat quarters of coordinating fabric.
4"x44" of contrasting trim fabric for binding or a package of bias tape.
1” Bias tape maker (or Teflon fingers) if you are making your own tape.
Iron
Thread
Walking foot for your sewing machine. (Optional) ~ Not strictly necessary but I’m giving you an
excuse to go tell your husband you need to buy one for this project!
Directions
 |
| 1. First off, cut your fabric into 16x22” pieces. If you are using quilting cotton yardage,
this will be close to 18”x22” anyway, just square it up and trim to 16” long. If you are using fat quarters,
just trim them up so they are exactly the same size. The sizing is a little adjustable here. If
your pieces were cut a little shy of 16x22, that’s ok too. What's important is that they are both the same size. | | | |
 |
| 2. Cut 2 strips of fabric that are 2” wide by the width of the
fabric (approx. 22”). Again sizing is a little flexible here, the most important thing
is that it’s 2” wide. Sew the strips
together so that you have one really long 2” x 44” strip. |
 |
| 3. Now run that strip through the bias tape maker following
along the folded edge with your iron. If
you don’t have a bias tape maker, go get one! – you cannot live without this indispensable
tool (well you can but you will need
Teflon fingers for your iron!). The Bias
tape maker will magically turn your 2” strip into 1” folded un-bias tape. It’s so easy it should be illegal. Ok It’s not a bias tape because we didn’t cut the fabric on the bias, but it
works the same in this case in terms of folding and it’s easier and uses less
yardage plus the bias bit doesn’t really matter for this project so we are going
to call this magically folded strip of fabric un-bias tape and move on. ‘Kay? |
 |
| 4. Lay your fabric so that the RIGHT SIDES are FACING OUT
(wrong sides together). Put a few pins
in there to keep things from shifting around. Now unfold and lay your newly made un-bias tape onto the edge of the
cut fabric lining up the edges as shown (right sides together).
Start sewing about 4-5” inches in from the end of the tape and start at
a point on the side of the fabric about halfway down. Like so: (The reason for this excess fabric will be obvious in step 6). Now sew using a ½”
seam allowance all along the edge of the fabric following the ½” fold line that
you just pressed into your un-bias tape.
Easy no? |
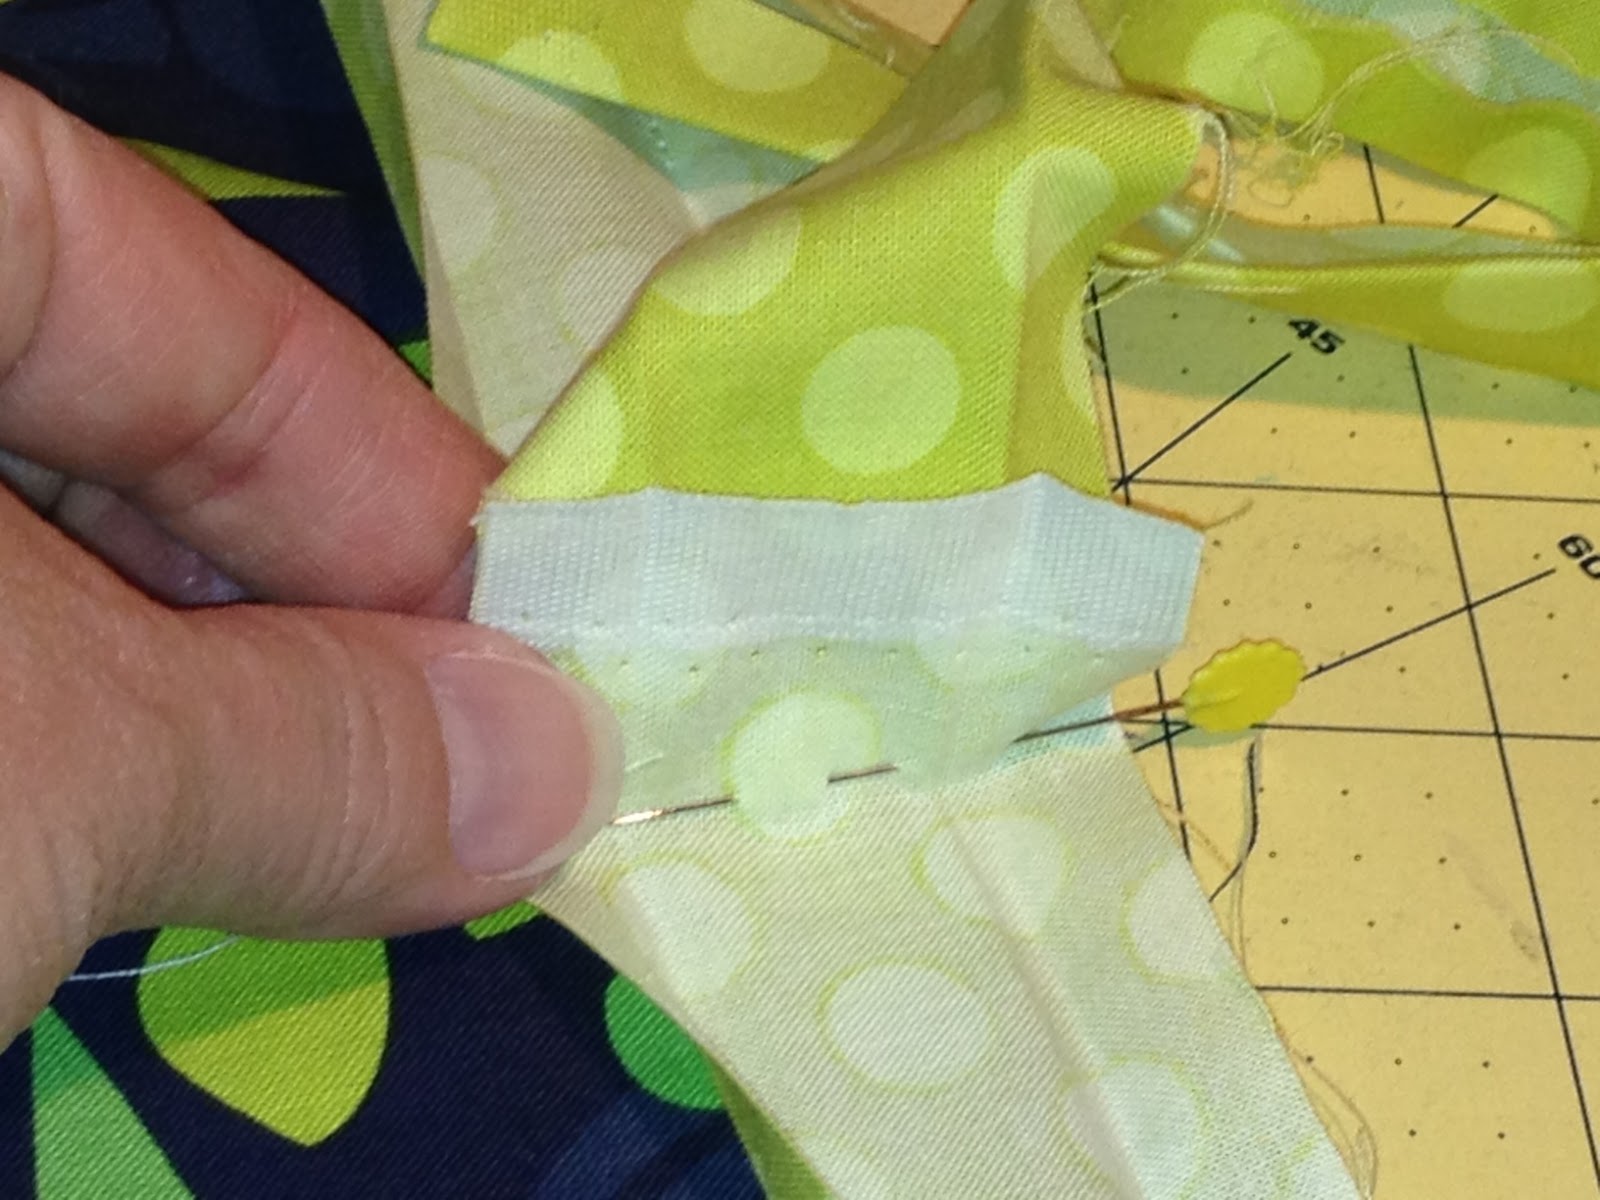
5. When you get to the corners you will need to stop sewing ½” in
from the edge of the fabric because we are going to miter these corners like it
was a quilt binding. Don’t panic! It’s
easy, trust me. Fold fabric up at 45 degree angle like so:
Then back down on top of itself like so:
Pin this sucker in place if you like so it doesn’t shift while
you go to your machine. Now continue to
sew a ½” seam allowance and stop when you get just ½” shy of the next corner
and repeat until all corners are sewn.
When
you are done with the last corner you will stop sewing a few inches shy of
where you started like so:
6. Why? Because now we are going to sew the ends of the tape
together. Lay the whole thing out on a
flat surface, it’ll be easier to work that way.
Now pinch up the 2 excess ends of the un-bias tape, lining them up so
they are right sides facing and even like this:
You want to pinch the ends at the point where they meet and
lie flat on the fabric. Place a pin
along this point to hold it in place.
The pin marks the spot where the seam will go on the un-bias
tape. Now fold the towel fabric out of
the way like this:
You will sew along the pinned line.
Snip off the excess leaving about ¼” seam allowance and you
should now be able to see how this tape lies flat on the towel fabric and you have a perfect seam!
7. Now finish sewing the un-bias tape down to
the towel fabric to close up the hole.
Voila!
8. Now we’re going to flip over the tape and fold it down on
the back side of the towel creating the mitered corner as we
fold. Watch ~ Fold.
Pin.
Check out the mitre! Woot. Pat yourself on the back!
Now attach your walking foot to your sewing machine. If you don’t have one, that’s ok too, it’ll
still work but the walking foot helps prevent puckering. You are going to sew down the un-bias tape approx.
1/8” in from the edge and pivoting at the corners all the way around
the towel.
TIP: Keep the needle down in your fabric when you pivot at the corners and you'll have a perfect stitching line. You’re almost done!
9. To avoid this whole thing from turning into a balloon straight out of
the dryer, you’ll have to add some stitching lines down the center and across
to hold the 2 sides together. I used a
grid pattern but you can do whatever pattern you like.
Go crazy!
How cool is your new kitchen towel? If you like you can snazz
it up with contrasting trim fabric across the top and some rick rack. Or not – it’s totally up to you. Wasn't that easy? Now go make a few more to share with your friends.
Happy Sewing!


 Now there's a tongue twister for you: Flag Map Mug Rug. Whoo! :) I just finished up this fun 4th of July Mug Rug as part of the Scrappy Mug Rug swap with a Red/White and Blue theme. This one is going to Cherry in Louisiana. It's a foundation pieced 5x7" block that can be turned into a mug rug or used for something else.